Spellbinders Platinum Preferred Product Partners hop

 
WOW how exciting a hop and prizes... who doesn't love fun like that!  To help celebrate and also to say thanks myself I am sharing today a layout created using some awesome products from some of the companies.  We were given so much awesome products from these very generous companies and I thought it perfect that today I share a layout with one of the many photos taken on my camera at the retreat.

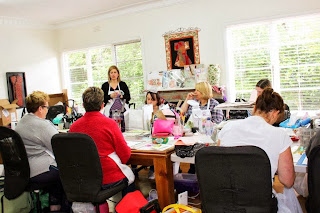
At the retreat I fell in love with some awesome products and these are just a few.  To create this layout I used the following products.  They teamed up SO well just like the Design team in this photo, we all seem to go together so well!  
To see how I used the lovely products in unique ways I have this short video showing the use of the stamp and the Fireworks to create the background for the layout featuring the beautiful lacey squares set.  

I have also some detail pics below so you can get up close with the stamping into texture paste effect and painting with the fireworks spray.


 Head on over to the different blogs for all the rules of the 'official' blog hop and how to enter.

Train Ride layout

Today to keep up with my more frequent blogging I am sharing with you a layout I recently Created for DownUnder Direct.  It is called Train Ride.

This layout was so much fun as I ended up using a paper collection that was very feminine, but had this awesome wood panelling paper as part of it.  I just love how it turned out!  The paper collection is Miss Teagen Sue by Bazzill and I teamed it up with some fun Spellbinders dies in S5-188 Super Ellipse and S5-048 Sprightly Sprockets.  I also used one of my favourite stamps 'Journey Gears' by 'Fun Stampers Journey' that I was lucky enough to get when I was in America.


If you want to see the full product list for this layout, head to the post here


Scrapbooking Memories Blog hop

Back again today as I'm playing along with the Scrapbooking Memories blog hop.  

I am sure some of you are having loads of fun trying to guess what the theme if you haven't already.

If you have just started at my blog, head over to Scrapbooking Memories blog for all the details and the start of the hop.  There is loads of inspiration being uploaded by the current Scrapbooking Memories Masters and Creative team.

So today I wanted to show you a layout that I created with photos from my honeymoon.  As you can see we both have beaming smiles from ear to ear as it was such a great holiday full of so much joy.  


This layout was created as part of my new Scrappy Chat designs 'Be Happy' kit.  It is one of the three layouts you complete with the kit with some written instructions and 3 videos.  I thought I would share it so you could see a little more about the kits.   This video is one of the bonus videos with the kit.  The main video for the kit is of the featured project (you can see details on the blog) which shows the full completion of the layout and full written instructons.  I always offer an additional 2 layouts with tips and sometimes a bonus video for you to complete in the comfort of your own home. 

Click below to enjoy the video and hopefully learn some interesting techniques.  All products used to create this layout (including sprays and stencil) are included in the kit.  


Here are some detail shots of the layout for you to enjoy if you can't watch the video link above yet :)


Next stop on the hop is Kerryn Lawson at 3:30pm AEDST

If you have gotten lost at any time, just follow the list below to find your way and have fun with the challenge.

Remember to leave your guess on the theme on the Scrapbooking Memories blog

12pm – Leonie 
12:30 – Heather 
13:00 – Anita   
13:30 – Sue 
14:00 – Georgia 
14:30 – Tarrah 
15:00 – Beck   <-- you are here
15:30 – Kerryn 
16:00 – Kaye 
16:30 – Peg 

If you want to have a little more fun and the chance to win a pretty cool giveaway... keep scrolling to my next post.  BUT don't forget to leave your comment over at the Scrapbooking Memories blog for a chance to win as part of this hop.


A giveaway....

So I have been very busy adding posts to my blog over the last few days and I thought today it would be nice to thank everyone visiting my blog with a giveaway!

I have uploaded lots of projects recently and it would be lovely to hear which ones inspire you.  So to take part and be in the running for my giveaway you will need to do the following:

1.  Follow my blog
2.  leave me a comment letting me know favourite project.
3.  Share my giveaway on your blog or FB (or both) for extra entries into the giveaway!

Giveaway will run until November 19 at which time a winner will be drawn.

The winner will receive some of my new product for Tinby Designs that I will be releasing shortly worth $30, so yes this is the only way you can get your hot little hands on it.

Looking forward to see peoples favourites of my work.


Scrapbooking Memories Blog hop


Just a quick one today to let you know that Tomorrow I will be taking part in a blog hop for the Scrapbooking Memories Blog.  This is going to be SO MUCH fun!!  


It will start at 12 midday on Monday 11th November.  Can't wait to see all your lovely comments!  


Surreal Creations retreat

Today I have the pleasure of teaching ladies at the Surreal creations retreat.  It was lovely at every fine detail.  The ladies were beautiful to teach and I hope I inspired them today.  The food... well don't get me started divine comes to the mind instantly!  Not to mention the absolutely stunning accommodation.

It was such a lovely retreat and I was sad to leave as I was just there to teach today.  It was a quieter smaller group and so I wanted to give the ladies something special as a memento for my class so last night I created these personalised tags that they could hang on their tote bags.  They were so much fun to create.  
                                      

I started with some Spellbinders Bezels - Triangles two and using the coordinating die I cut out some triangles out of Spellbinders  luminum Sheet.  I also die cut the smallest of the Hearts one die set as well.  I ran these through the Spellbinders Artisan Explorer with the grate works tow embossing plate.  I just LOVE this pattern.

Next I coloured up the embossed metal shapes with Tuskineko Gold metal StayzOn.  I also added a little purple colour with a Copic Marker.  I made up the bead charm using some beautiful beads and wire from Beadalon  and added that to the Bezel.  I also used the Beadalon  Jump ring mandrel which the lovely Julianna Hudgins shows me how to use at the Spellbinders Retreat.  The last step was to add the personalised chipboard alpha for each of the ladies names and fill the bezels with some Susan Lenart Kazmar Ice Resin.


When cured I added them to come hand made tags that had just a little spray with a stencil and some scripts stamping randomly.  Each tag had the words 'Dare to be the best you can ' 

Here are some pics from the day.

 Busy Busy teaching


The ladies of Surreal Creations Danni and Hailey


If you are looking for a fun retreat to attend definitely worth attending!  I know I will be in the future!


A tutorial and some Downunder shares full of Spellbinders goodness

I am sorry that the announcement for my giveaway is not yet up. I will have that up shortly.  In the mean time, I am here to share a little tutorial for creating some yummy embellishments using Spellbinders dies and metal.


Take some metal stamps and a piece of Spellbinders Aluminium sheet cut/embossed with S4-114 Standard Circles Small.
Using a hammer, stamp the letters for your sentiment onto the circle.
Add this piece layered on the tag with S5-181 Bracket Borders One, in two layers down the bottom teamed up with come cute My Minds Eye papers, and assorted buttons.  Finish it off with a little twine.

You can check out the full product list on the DownUnder site here 

Thanks for stopping by!  
xxxBeck BT

Downunder Direct share full of Spellbinders Goodness

Yes as promised here I am back again to share some more inspiration for you 10 projects in fact!  I have been busy creating lots of projects for the Downunder inspiration blog that I thought I would share some today on my blog.  Hope you like what I have been creating and find something that inspires you to create as well.

I am going to kick off this large share with a little tutorial for a birthday card to show you how to create the perfect coloured frame to the edge of your die cuts.

Start off with the die template here I used Classic Rectangles large (S4-132) #4 die template.

 I took the Dark brown chalk and inked up the die template.
 I first cut out the feature element I wanted to keep in tact (the cake)
 I then placed the inked up die template where I wanted it to cut and stuck in in place with some tape.
 I cut/embossed the paper using the Grand Callibur Machine and die template, transferring the ink to the paper.
 As I removed the paper from the die template it has a beautiful colour frame to help it stand out.  I added some dimension behind the piece as well as the cake for some added impact.  I finished off the card with some die cut Spellbinders Sprightly sprockets.  The perfect male card for my brother that was turning 40.


 Here are a number of other projects I have been creating...

I really enjoyed playing around with the background on this layout.  The whole layout was made using white cardstock although you'd never know it!  Even the brown was coloured using some distress stain!  I added sprays and splatters of colour.  I also used some fun mixed media on this one with texture paste, gesso, metallic melts sealer and tea leaves.  I also created most of the embellishments on this page from the frames to the flowers using Spellbinders dies.  I only added a little lace and twine!


I just love how easily this card comes together with Spellbinders Exquisite labels eleven.  I teamed it up with Spellbinders Carnation Creations, it took me a little time to create them, but how pretty are they!


 Oh how much fun I had with the background on this one.... layers of Tsukineko/Imagine Crafts fireworks and goosebumps teamed up with some stamping and stencilling.  Love how the circles in the various dies I used, work well together on this one.


 Spellbinders gold technology is AMAZING!  I just love that I can letterpress AND emboss all at the same time!  Love the vintage look it gave this card.

I love how simply embossing the cardstock can create more interest to a card as done on this card.

I love the pretty colours of this one.  I added some embossed metal into the hat pin and coloured it with copics to get that beautiful effect.  
  
 The Bezels from Spellbinders are SO versatile. Again I embossed some metal and cut it out with the co-ordinating die, added embellishments some Ice Resin and ribbon and TA DA!  A necklace.  I also embellished it with one of the bird blanks I embossed and coloured... if you would like to see how this is done, check out my 'Emmy's post' for a step by step tutorial


 Recently I taught a class and while showing the participants how to stencil with the ferro I started this layout.  I really enjoyed building up the layers on this one with some stamping, gelatos smudged into the background with a baby wipe as well as stamping with the baby wipe to create more interest and texture.  I also added gelatos over the ferro for a little more interest on the brick pattern.  As I was creating all the colours myself I was able to tailor it to the pictures.  I also used the gelatos to colour the layered pieces of paper behind the main white sheet and stitched them together.  I also added some fun Spellbinders die cuts with the new Tile Works to finish it off.


 For this one I was one again enjoying creating my own background an building the layers as it came along. I used so many different products, including Tinby Metallic melts, stencils, pastel pitt pencil, gelatos, gesso, goosebumps and gauze.  It didn't need much more to finish off this page other than some Spellbinders die cuts in the Captivating Squares, Crisscross expandable pattern, Squares large and also a shield bezel.  I rarely scrap such a small photo, but it just worked on this one.  


Well I hope you enjoyed another large share from me today.

Looking forward to showing you some more real soon!