August kit release

Here it is, the new August kit over at Scrappy Chat Designs


This kit features the use of Metallic Melts, My Mind's Eye stamps, Fancy Pants Designs alphas and stickers and Twiddleybitz Chipboard.  This is all teamed up with beautifully designed paper from Fancy pants.

You will have fun learning various ways to use your stamps and Metallic Melts as well as working with co-ordinated patterned papers  and stickers to help your layout come together so quickly.  

Kits are still $39 + Postage with LOADS of value for you money.  International shipping available so please enquire.

Here is some more information for those wanting a to know little more information about our kits.


They are self-paced class kits to complete in the comfort of your own home or with a group of friends

Each premier kit comes with:
  • Video AND written  instructions of the featured project
  • Tips (and sometimes additional technique videos) to complete additional projects with the kit contents
  • Feature a particular technique or product to be used well after the life of the kit.  (With all of our kits you will have plenty of product and knowledge to add to future projects)
  • Photos of each project including close up detail pictures
  • All the product needed to complete the project with a list of additional basic items used such as ink/ paint/ gesso/texture paste you will need out of your supplies.
We always include some less or non-consumable products in our kits, to not only help you complete some beautiful projects, learn many techniques and ways of using the different product as well as taking them well beyond the kit projects.

Kits are $39 + postage


To order e-mail us at orders.scrappychatdesigns@gmail.com

Scrappy Chat Designs Kit club Membership:

This lasts for 3 months is $135 and includes 3 kits at 5% off and postage for all 3 kits (they are released monthly).  I also pop in a little something extra as a thank-you for being a member.  As a member you also get ‘insider’ info on what is coming up in the next kit – sometimes even a pic!  You are also guaranteed the kits which do sell out VERY quickly.  If you are interested in membership, you need to pay the membership fee by the 15th of the month prior.  So to commence in September you need to have your membership fee paid by 15th August - due to the late release of this one, I am extending this until the 20th August.  

Current Kit stocks:
We currently have a few of the following kits available after re-stocking:

Friends for Life Premier kit $35 (reduced price)
Treasured Memories - class kit $ 25 (reduced price)
Playground Fun Premier kit  $35 (reduced price)
Catch up Premier Kit (1 left) $39


A quick update

Today I start my official term on the Spellbinders Design team... let the busyness begin!  Heading to Phoenix in 5 days and I am SOOOO excited!!  I will be reporting with pics and updates as much as I can.


I also have some other exciting stuff happening, tomorrow as it is our first leg of the 'Victorian Scrapbooking Memories Master's' tour.  We are so excited to be bringing the ladies some awesome products to play and learn how to use while creating 3 fantastic layouts.  It is going to be so much fun with the Geelong Kaisercraft outlet giving, goodie bags, lunch for those staying all day and we us and our sponsors are chipping in many giveaways and an awesome atmosphere sure to be had!  There are a couple of spots left, so if you are interested in coming contact the store on 5222 3965 or e-mail me on orders.scrappychatdesigns@gmail.com

I have been working away on LOTS of things including some upcoming classes, one over at A Fastlane Scrappe Supplies and also for the Lady of the Manor Retreat in early october.  There are links on the side of the blog.   Feel free to click to see more about the retreat or the store that I teach at monthly.  

Well... I must be off and get all this work done before I take the biggest trip I have ever been on next week which I am fortunate enough to be travelling wtih the lovely Linda Lucas


Explore Beyond a Cheesy layout

Today I'm showing you a cool technique with a stencil to add a little more of a grungy feel to your masculine layouts.  I never like all the elements to be grungy as I feel the mix of crisp and clean can often make the perfect contrast.  So I thought what better than some Spellbinders die cuts to break it up.  I find the crispness of the die cutting with the embossing line really finishes off the elements you might add to a page.  There are SO many beautiful dies that can create those accents to your layout like the 'stars', ‘tab’ & ‘scalloped circle’ I teamed up together with this grungy background. 

I couldn't resist using these dies when creating one of the additional layouts to my Scrappy Chat Designs Premier kits and so I thought I would share it as part of this post to give you a sneak into the type of layouts you would learn to create. 


I really love the corrugated cardstock by Fancy Pants Designs, as they are so cool to work with and add a fantastic element to pages. 

Spellbinders ‘Stars five’ would have to be one of my favourite dies and I love to add some pretty cool dimension with them using Helmar Liquid Scrap Dots. 

Check out this little technique video to see the background comes together and watch how I add the stars to my layout giving to give them some real height without unsightly foam tape. 


Products used:
Spellbinders Grand Callibur Machine
LF-124 Grand Scallop Circles
S4-092 Stars Five
S5-052 Creative Page tabs
Fancy Pants Designs - Park Bench Collection
Bazzill Basics cardstock - Black
Texture Paste
Dylusions Sprays - Turquoise & Black
Misc Washi Tape
Helmar Liquid Scrap Dots
Helmar 450 Quick Dry
Helmar Professional Acid Free
Misc old book paper


I hope you have enjoyed my share today and if you have come on over from the Spellbinders Explore Beyond site, have a view through my blog and you will see lots more Spellbinders inspiration.


July Kit Release - Scrappy Chat Designs

I have been quite sick over the past 2 weeks but I have gotten this kit out a couple of days ago... This kit is SO MUCH FUN!  full of so much yummy'ness to play with!


This kit features the use of Stencils, on trend washi tape, sequins, dew drops and so many stickers and die cuts that you will have plenty left for other projects.  This is all teamed up with beautifully designed paper from Fancy pants.

You will have fun learning various ways to use your stencils as well as working with co-ordinated patterned papers die cuts and stickers to help your layout come together so quickly.  

Kits are still $39 + Postage with LOADS of value for you money.  International shipping available so please enquire.

Here is some more information for those wanting a to know little more information about our kits.


They are self-paced class kits to complete in the comfort of your own home or with a group of friends

Each premier kit comes with:
  • Video AND written  instructions of the featured project
  • Tips (and sometimes additional technique videos) to complete additional projects with the kit contents
  • Feature a particular technique or product to be used well after the life of the kit.  (With all of our kits you will have plenty of product and knowledge to add to future projects)
  • Photos of each project including close up detail pictures
  • All the product needed to complete the project with a list of additional basic items used such as ink/ paint/ gesso/texture paste you will need out of your supplies.
We always include some less or non-consumable products in our kits, to not only help you complete some beautiful projects, learn many techniques and ways of using the different product as well as taking them well beyond the kit projects.

Kits are $39 + postage


To order e-mail us at orders.scrappychatdesigns@gmail.com

Scrappy Chat Designs Kit club Membership:

This lasts for 3 months is $135 and includes 3 kits at 5% off and postage for all 3 kits (they are released monthly).  I also pop in a little something extra as a thank-you for being a member.  As a member you also get ‘insider’ info on what is coming up in the next kit – sometimes even a pic!  You are also guaranteed the kits which do sell out VERY quickly.  If you are interested in membership, you need to pay the membership fee by the 15th of the month prior.  So to commence in July you need to have your membership fee paid by 15th June.  

Current Kit stocks:
We currently have a few of the following kits available after re-stocking:

Friends for Life Premier kit
Treasured Memories - class kit
Playground Fun Premier kit


A dream come true!


Today I get to announce the most exciting news!  Many would know I have been going through the process of the Spellbinders World Wide Design Team Competition...

First round one: 40 peeps announced - phew got through that...

Then round two: 40 down to 19 (which included creating a video of the project)- phew got through that as well.

Finally the big one... the FINAL ROUND.  I was all geared up to create my little heart out.  I was sent particular dies to work with to create my final project...  Well today and yesterday I was waiting for that call.... the call from Stacey Farneth Caron inviting me to be part of the Spellbinders Design team.

I was up early, hoping and waiting for that call to come.  And it rang!   'Hi it's Stacey....' it felt like ages until I heard those awesome words.  'We would love you to be part of our Design Team' I think I nearly dropped the phone, somehow kept the tears back, was a little speechless, and OH SO EXCITED.

Then double crazy excited... 'We'll contact you later today with all the details and get your flights sorted...' yes my flights to America!  I haven't been to America so this too is a VERY SPECIAL treat!!  I can't wait to meet the awesome team of talented ladies, so many of whom I have followed and admired their work.  this is going to be one hell of a year in my creative world.

You can check out the complete announcement here.

Back in school I was always creative studying Art all through high school and it was my strongest subject.  I always said I would go off and get my business degree first as that will pay the bills - art wont.  Well I am glad I did that because it has given me a basis for a great deal of what I do now working for both my husband's business as well as my own.  I am learning that in this industry Art CAN pay the bills though you have to work at it and an amazingly inspirational woman in Stacey Farneth Caron (who recently was named top 3 in her category for the Earnest and Young Entrepreneur awards over in the US) has definitely shown me this.  To be part of her team is going to be amazing!

I am loving where my art is taking me even if it isn't in the traditional sence of the type of art most would know, but I always tried different things even back then when it came to my art, so it is no surprise to me really, why I love this craft that takes me on so many artistic journies from Scrapbooking layouts to record special memories, to cards to give to others as well as many 'off the page' or altered projects that can let my creative heart run free.

I am super excited today to be fulfilling a big dream, and looking forward to the future and what that may hold as well.


My Master's journey the second installment

Here I am back again with the next installment of my Scrapbooking Memories Master's winning competition entries.

I thought I would show you my canvas next as I think I love it as it has my whole family included on it.  The brief was to create a 12 x 12 canvas full of texture using various things such as fabric etc.  So I decided to turn my canvas around and create one in the back of it.  You wouldn't think you would get so many photos inside the reverse of a 12 x 12 canvas, but I did with some only being about 1cm square!  I think that is what I love most about it... there are heaps of different memories in this one project.
The main of the inspiration for this came from a frame collage I did on our hallway wall with photos of all of us.  I have a beautiful word in the middle and I wanted to create something that was similar for my Scrapbooking room which is also my office and our family area... yes it is a busy room lol

I went about starting creating texture as stated in the brief... the first one went a little too far with this, so I scrapped that one and started again.  Wtih the fresh new one I added layers and layers of texture from canvas, to cardstock, stamping, stencilling, texture paste, paint, crackle, metallic rub, more stamping, inking paint, and old book paper around the outside.

In the inside I wanted to give a 'floating' effect to all the frames and the word and I did this with some gauze that had been soaked in fabric stiffener and allowed it to dry.  I hadn't really figured how I was going to suspend everything, but this really made it a whole lot easier.  I did still go through a WHOLE tube of Helmar Liquid Scrap Dots in creating the project no real shock to my followers I'm sure!  I love the finishing touches the Twiddleybitz and Scrapware chipboard added to the finished project as well.


It is one of those, need to see in real life projects, but hopefully you can see some of the detail in what I created.  It is now hanging proudly in my Scrap Room!

I will be back before you know it with the next installment!


My 'Master's' Journey the first installment

Here I am today sharing my Master's projects that were created for the Scrapbooking Memories Masters Competition of which I was named along with 9 other talented ladies a 'Master' for 2012.  I was notified via phone call from the Editor in September 2012 and had to somehow keep it under my hat until Mid December 2012 when the special edition 'Masters' issue comes out.  That was SO tough!!

So to start I will take a moment to back track and tell you a little background about me entering the competition.  The year I started scrapping 2008 was the first time I entered.  I really enjoyed the process and back then and there was 2 rounds the first went off photos of the projects which I didn't have much of an idea about back then, but I gave it a shot.  I was aiming for the top 50 that the honorable mentions came from, which also gave you an opportunity to send in the physical projects.  

I got my entry in, in the midst of planning to move back to Melbourne from Perth, and when the calls would be made I was going to be travelling. I soon realised that I hadn't made the cut, but I was super proud of my efforts and was looking forward to a new life beginning for my husband and I which was that I was pregnant with our first child.  

2009 life sure got busy as my eldest is a May child which didn't work in well with the following years competition which the criteria is usually released in the June issue of the Magazine.  He was one month old andI had bigger things on my mind that year.  

2010 I really thought of entering and had even thought of what I wanted to create, but I just didn't get around to it.  I was busy with a 1yr old and I had already fallen pregnant with our second child so it just wasn't going to happen.  That was enough for me that year.  

2011 came and having a 2yr old and a 6 month old, life was super busy for me as a mum.  Again I thought about what I would like to create for the entries, but life got in the way and I just didn't get around to it.  I guess I was too busy 'making' the memories.

2012 came and I ummed and ahhh'd about entering.  I had for as long as I had been scrapping wanted to eventually achieve that title, and I felt my scrapping had lifted a level that year.  I was loving what I was creating and how I had really started to develop my own style.  It was a message, on a chat I think, that a friend Renee Aslette asked if I was going to enter... well I guess that was the making of the decision.  Not sure why, but I guess I needed to stop dreaming about entering again and just do it.  So I made the decision to put in.

I started creating early on my first project and had that nearly done.  Ideas for my double layout and canvas were in my head also.  As for the last one which included memorabilia, I had NO IDEA.  I then got quite sick with sinusitis and it really knocked me for six, and those that know me know that doesn't happen too easily.  That, along with my young boys being sick on and off I didn't find much time to put into the projects...  Two weeks to go and I knew I had to get moving if I was going to get this entry in.  A new paper had been released at CHA that I wanted to have SO BADLY but didn't think it would be out in time until I saw an online store advertise it... I just had to have it and I put in a speedy order trying to get it by the end of the week (usually 3-4 days postage from where the store was).  It was going to be perfect for my memoribilia layout of which I now knew what photos I was going to scrap (no idea how).

I got moving on my canvas and double layout, and I was still quite sick that week and I remember not enjoying it and pushing myself as I knew I would regret it if I didn't get my entry in this time.  I got my entries into the post and I was so happy to have gotten there.  I will tell you more about each one as I go along.

The first project I want to share is my double layout reflecting my childhood.  

When I read this criteria, I knew where I wanted to go with it.  I asked mum for my baby photos and started looking through them.  The quality of them is nothing compared to what we can take these days but I found some that would work and so I decided to focus on all the dresses my mum made me a child.  

I also found inspiration from the colours of the 70's being a 70's child orange is what came to my mind... we had orange couches, curtains and decor.  In looking through papers at my local scrap store I saw the Authentique range and I knew it was perfect!  I then had to choose what techniques I wanted to build into the layout.  Seeing this was going to be my only real girly layout I decided on wanting to showcase hand made flowers and embellishments as well as patterns usually used on a more grungy feel layout to be all prettied up.  

I created it over 2-3 days from memory pushing myself to get every little detail done and finished as quick as I can as I still had another 2 projects to get done in a week and a half.

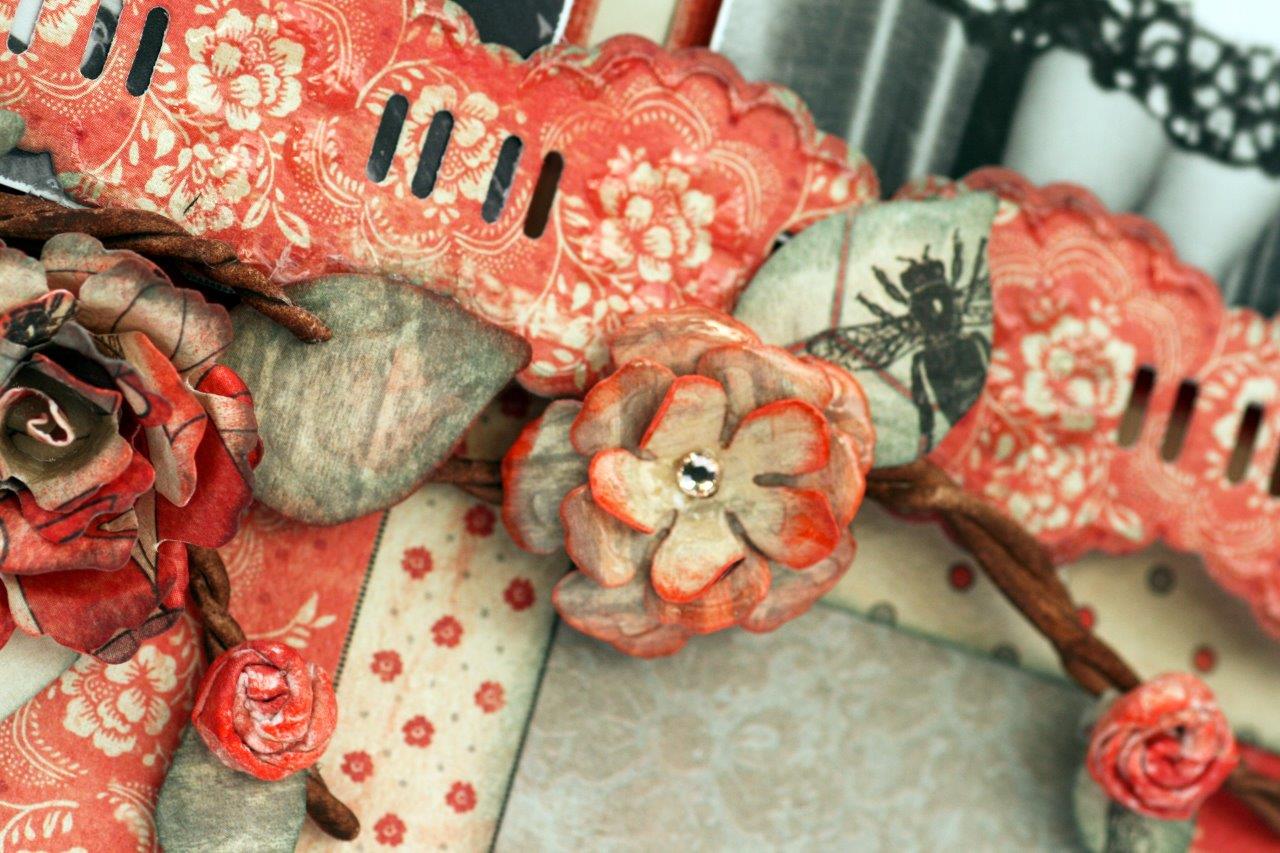
I used Spellbinders to create all the beautiful flowers on the layout, and 'paperclay' to create the vines bringing them all together.  I also used some beautiful Sworvski crystals teamed up with the reverse chickenwire stencil and some inking to alter the plain cardstock to tie in with the paper collection.  There was a whole lot of punching with hexagons in different sizes to create more interest.  I absolutely adored how it came and I just hoped it was what the judges were looking for!  

Here are some pictures of the project:


This was definitely a challenge for me as I don't do double layouts often at most I would put two layouts done with the same papers together in an album.  I did enjoy the process though!

I do hope you have enjoyed reading the first installment of my masters journey, and come back to read all about the other 3 projects I created as part of my entry.  

Additional kit over at Scrappy Chat Designs

While we are waiting on the release of the June Premier kit I thought to keep your enthusiasm, I have decided to release the sale of a class kit I recently taught of which I have a few left over.

Kit is $30 (+postage) and there is still loads in there including an awesome stencil and corrugated cardstock, as well as matching stickers!  You will receive detail photos of the design, instructions by way of measurements and photos, all e-mailed to you along with a short technique video on how to create the background with the stencil.  The only items additional to your basic kit you will need of your own to complete it is  some black paint, Distress ink in Tumbled Glass or Broken China,  Spellbinders lacey circles die set, a stamp or rub-on for the words on the ribbon strip as this stamp is not included in the kit.  Remember if you don't have the exact, substitutions can always be made and I'm sure I'll have ideas for you if you e-mail me.
   
I’m trying to get the package of the two under 500g so that there will be no additional postage charge to those purchasing the June kit and would like them shipped together, but I can’t confirm that until the chipboard that the kit is missing arrives (it is right on the borderline with weight at the moment)

If you are going to be in Brisbane this weekend, I will be attending the Scrapbook and Papercraft expo and can arrange to meet up and give you your kits then if you prefer as well.


If you would like to order the kit, e-mail me at orders.scrappychatdesigns@gmail.com


Another step closer to fulfilling a big dream!


Today I thought I would share with you some VERY EXCITING news I got this week.  I have been taking part in the Spellbinders International Design Team Contest and after two rounds of nail biting waits I am through to the final round!  It is now down to me and another 18 extremely talented artists to create our final project.

Read up on all of the blog post here and check out the names of all those that got through.

I want to take the time to especially thank the Spellbinders team for seeing something special in my projects and giving me the opportunity to take part in the final round to hopefully wow them with another project.

I also hope that those that didn't make it through to this round find the right door open for them REAL SOON!  Everyone's work has been amazing and I'm sure it was the toughest decision for both the rounds so far to choose those successful.

I will be giving it my all for this final round and please have your fingers crossed for me while I do.  Really hoping to fulfil my dream of making a team I have aspired to for quite a long time!


Ladies of the Manor Retreat Victoria

Want a chance to get away and do something special for a whole weekend?

This retreat is sure to be one to satisfy with loads of prizes, give-a-ways, competitions and awesome sponsorship from Manor House Creations to make this all that bit extra special!

There will also be classes that you can book into as well as make-and-takes.  Tutors include myself, Karen Shady, Trudi Harrison and Heather McMahon.

Click here for all the details and to put in your expression of interest.


Having fun with Bazzill Spellbinders and Just Rite stamps.

So in the main the projects I create for Downunder Direct include Bazzill papers often teamed up with Spellbinders products and Just Rite stamps.

These are the recent projects I have created over at the Downunder Direct Inspirational Blog.


I hope you have found loads of inspiration in these projects.